28 February 2017

What gear to shift in

Disclaimer

This is actually a topic I wanted to avoid, however one of the readers asked for it. If you have very few readers, you cannot ignore that, can you? I would say even if you have millions of readers you cannot ignore them, but it might be much harder to satisfy them all.
Okay, I do think I should actually start with a disclaimer here. Specifically to point out that the stuff below is an opinion. Although I believe there is no error in the text, I am aware that a starting photographer has not seen all there is to be seen about gear. Not that a lack of knowledge keeps me from having an opinion, but really, use your sense when going out to buy. Don't just follow one opinion. I really would be unhappy if I am told later that I "advised" something that you would not feel comfortable with at all.
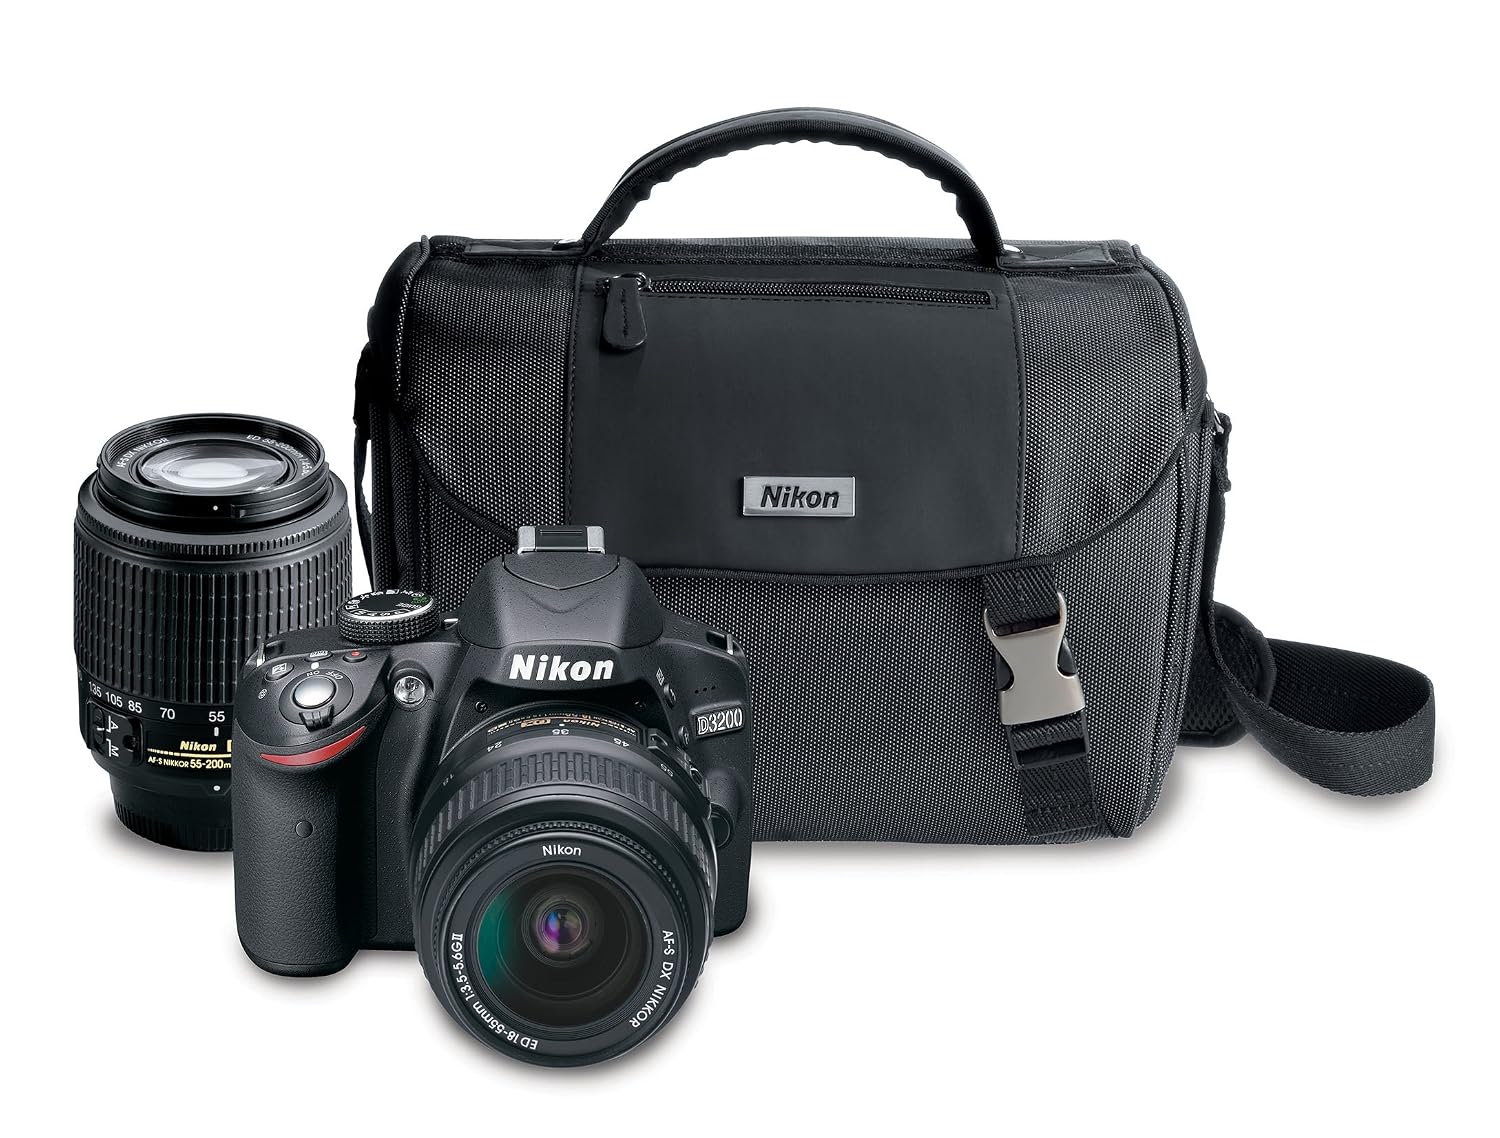
Nikon D3200 kit
Now, my very, very short answer is:
Buy the entry-level Nikon or Canon DSLR. Not their latest model, but the model before that. For a beginning photographer, these are powerful enough, yet affordable. And by buying the model before the latest, you also save a bit of money. If possible: buy a kit (body and lens).
I ended up with a kit like this. Mine has a 55-300 mm lens and VR (Vibrance Reduction) though.

Needed equipment

Buying a camera is more personal than you would think. Sure, it's just a thing, but if you do well, it will be with you for years. Like your spouse. Or, if you really go too far with your hobby, even more than your spouse! I would suggest that you pay more attention to your spouse than your camera, though. Even if only that the camera will not divorce you. The spouse might.
Now, I bought my camera a little over a year ago and went to the shop having no clue what I needed, or even what I actually wanted. Even if I think I ended up with a camera that suits me, it was surely not the smartest thing to do. Not even for a noob. So, I'll write about a few of the things that I picked up in the mean time, to hopefully help someone else make a better informed choice.
First though: what is needed for starting photography? Easy: anything that can make a photo is enough. A cheap camera can make photos, your cell phone can make photos. Most of this will be an opinion, and even a beginners opinion, the two lines before this one are a fact!
So, back to the opinion part, where I would say: before buying an expensive camera, you might want to start shooting photos with a cheap camera or a cell phone. Then see if you actually like taking photos and if you think about making "better" photos. If you just think about making more photos, don't buy the expensive camera yet.

The type of camera

I ended up with a Digital Single Lens Reflex (DSLR) camera, but you might as well get one of those mirrorless system camera's. The latter are a bit smaller and weigh less, while still having the capacity to switch lenses. As far as I read, the quality of both types are around equal. The system camera is currently most likely a bit more expensive, compared to a DSLR of equal quality.
Another difference is how you as photographer will look at what you will shoot. With a DSLR, a mirror will send the light coming in from the lens towards the optical viewfinder. That means that you are actually looking through the lens and see for yourself. Most also have the LCD screen on the back. That is not the light falling on the lens redirected to your eye, but the light falling on the sensor and from that the image is composed. That should be what the camera will "see" when taking the photo.
A mirrorless camera obviously has no mirror to send the light towards your eye. So it does the same as a DSLR does, it takes the image from the sensor and projects it on the LCD screen. To be more complete, there are also camera's that have an Electronic ViewFinder (EVF). This looks like the optical one of the DSLR, but the image is projected there.

I think here are interesting choices to be made. A camera with a viewfinder is basically held in front of your eye and a bit stabilized by your head. Also, your arms are close to your body, giving much less chance on motion blur. If you want real sharp while hand held, I would definitely go for camera's with a viewfinder and not only an LCD screen. If you mostly shoot on tripod, then this would not matter.
An EVF can show extra information, like a histogram when it shows you the image. Or any other overlay the manufacturer might think of. So far, I saw no use of that, but a pro could most likely point something out.
A camera with EVF instead of Optical ViewFinder (OVF) can be problematic when you need certain timing. The EVF's are getting better, but they may still lag a bit as they show the image. So when you need to press the shutter on exact times, you might miss the moment. Now, if you're a landscape photographer you would not care, as I never saw mountains run away. Nor an ocean or a tree. But should you want to take photos of running mountains, use an OVF. 😀
Also be aware that an OVF uses no battery power. You simply look and that's it. Of course, do not forget to remove your lens cap, or you won't see much. An EVF, like an LCD does use battery power and you might need to bring (more) spare batteries, or take less photos.
As I bought my camera, I had no clue about all this, so did not even bother to talk about such things with the vendor.
My personal choice would definitely be a ViewFinder, I would surely not go for the LCD only option. For system cameras. the EVF might be included (usually higher end models), or an extra option. I do not think there is a DSLR without an OVF.
If the choice would be between optical or electronic, the choice would be less clear cut. But in the end, I would prefer not using much battery power and I like to be able to simply look and see what is there to see. I should add that I have not that great eye sight, so sometimes just looking and zooming in can also help me notice things I did not see before. And I am too lazy to wear my glasses.

Glass! And more glass.

The more important part should be the lenses. Good lenses are expensive, so you surely would want to be able to use them on a better camera, should you decide later to upgrade. That means, unless you decide for a high end camera, you need to not only look at the entry level one, but also whether the lenses fit on other more high end cameras. If you take a camera from the big brands, that will not be a big issue, but you might be stuck on the brand. Or you might later want to sell your lenses. Given the costs, there is a market for sued lenses (and cameras, or as they are called: bodies).
More expensive camera's will probably yield higher quality photos. But the most can be gained by getting better lenses. Lenses that allow a lot of light through, that have little distortion and... well, tend to cost more money.
Leica APO-Telyt 1600mm f/5.6
And I am not talking about this 2 million dollar lens here. In case you think you read it wrong. Nope, this baby is according to this article two million US dollars. But lenses costing thousands of euro's (I am European, so yeah, I always think euro's) are not exceptional. And should you buy something expensive it would be nice to be able to use that on your next camera.
As another indication of lens prices: I just looked at the lenses in stock in the webshop of the shop I bought my camera. Then I sorted by price and the cheapest on the first page (25 lenses) was still over 4000 euro. These probably will not be the lenses you start with, though. But if you really want to become a professional photographer: good luck, these are the prices you might get close to then.
In my opinion, this is where you would need to look at most, if you are serious about photography. Because if you want to get better photos, or specialized photos, then you will for sure buy new lenses. And you want to keep using those, even after you buy a newer camera. My personal advice would be: stick with the main brands on buying your (entry-level) camera. They have plenty of lenses available, they also have the more expensive high-end cameras that go with these lenses. And when it comes to the top brands, there seem to be only two for beginning photographers: Nikon and Canon.

There is of course much more to be said about lenses, and accessories - which I have not mentioned at all yet - but I will leave that for a future post. I do hope this post at least showed a glimpse of things you might consider when buying. However: besides thinking long, sometimes the easiest thing to do is: go to the shop, let the vendor explain things and take his advice. Also nice to know: there might be shops near you actually renting out cameras. You might want to do that, as it does allow you to get a real feel about the camera.


22 February 2017

Composition, the magic word

Composition? Are we musicians?

Being a non-native English speaker, I regularly look up words online. Google, Wikipedia and many others are awesome at giving you apparently answers on any question you can think of. And even some questions you would not think of. Like these below:
Which I found, using Google, on a site of the Daily Mail.

That aside, let's go back to composition. A word I also checked, before writing this post. In this case I arrived at Oxford Dictionary. If you did not click the link, the first definition says it is "The nature of something's ingredients or constituents; the way in which a whole or mixture is made up."
A photo is made up of light. Until we print it, then it's made up of paper (or whatever material we printed on) and ink.
The second definition makes things more interesting: "A creative work, especially a poem or piece of music." So yes, we are like musicians when we make photos. In case you think we're all like the ancient master composers Mozart, Bach, Viveldi and so: no, we're not. Some of us are like a six year old child playing Twinkle, twinkle, little star on a xylophone. Let me show you my skills: https://www.youtube.com/watch?v=8EFZq9lcM2U.

To be fair: I say both of the definitions are correct. Indeed a photo is composed of light, and light is one of the most important aspects of composition. There are many photos which are all about shadows and highlights. A photo is also composed of the elements visible on it. And there comes the music composer part. Because we can choose what should be on the photo and what we leave out. We can choose the angle from which we take that photo, the time of the day to have more or less light. So, yes, we are musicians. With a camera, instead of a musical instrument.

Show me the easy thing

There are many articles and books written about composition, there are plenty of rules to follow. But if you want the most simple one, it has to be this: fill the frame.
Take many photos from people going on vacation, shooting their family and friends on every location. And I guess many will look a bit like this one, that a friend of me took on a wedding. A bit distant, the subject in the middle of the frame. Lots of things around the subject.
I like the people on the photo, after all I was on their wedding (nope, not on that photo), but that only makes the photo worth something to me, it does not make it a good photo. I don't like to say it, but this is actually not a good photo. There is a lot of stuff on it that adds nothing, except distraction from the important part: the happy couple - and the back of the head of the girl blowing bubbles at them, which you don't see.
All that stuff above them and on the left of the photo could easily have been left out and the photo would still contain all relevant information. Here comes the easy thing then: if you fill the whole picture with just your subject, you do not have to think much about how the composition of the whole photo needs to be.


Then check the photo of the lion. There is simply nothing, except the lions head on the photo. This photo uses one of those "rules of composition": fill the frame. By zooming in until there was nothing else visible, I did not have to bother with further composition anymore. I did not have to think about whether something would make a photo better, or whether it would be a distraction.

There was no need for leading lines towards the subject. No need to make sure the subject was lighter and therefore attracted more attention. I will not say this photo is the best ever and it will probably never win any awards of awesomeness. But it does have a better composition than the first one, even if it is probably less "exciting".

If you make all your photos with the frame filled by the subject, you will have often a bit boring collection, though. Photos also can tell stories or bring over emotions. For such things, you will usually need context.
Compare again the two photos. The top one shows multiple people, it shows the candy bouquet of the bride. You might not guess it was a wedding, but you probably would conclude this is a festive happening. On the other hand, the second photo shows a sleeping lion. Where, how? No clue, the photo does not tell it. I can assure you the lion was very alive as I took this photo, but just from the photo, one might think it's a photo of a dead lion. Keep that in mind when you fill the frame with one subject, it generally excludes context.
I hear you mumbling: "Yeah, dude, so that is not even always useful, where was this great super easy composition tip?"
Hey, I did show you an easy way of composing, I did not say it is perfect, did I? We need to be fair, there are many books and articles written about composition, just because it is not that easy. Especially not as so many of these articles tell you that if you understand and mastered the part they talk about: "Now go and break the rule, so you get the more creative photo." And they all also tell you that it's good to follow the rules, but it is equally important to know when to break them. Helpful, isn't it?


Why is this crap in my shot?

There are pretty good explanations about why we have many things on our photos that we do not want to have there. And worse: we did not even notice them as we took the shot. As I am no psychologist, I won't go into the gory details, as that would be way over my head. But the reasoning about this is luckily easy to understand for a simple guy like me.
Think about walking on the plains. You look around you and can see far and wide. You notice everything, the trees on the left. The foliage in the distance on the right. The hill slightly behind that foliage. And there, near you, at the front are the beautiful purple flowers. You also see the four birds flying behind each other in the sky. We humans are awesome as we could see that in one glance, right? Unfortunately, not totally. Subconsciously we have changed where we looked, changed our focus. We saw multiple details and our brain is putting all that together to give you that image of the plains with everything on it. Were you sure there were four birds? You don't even think about moving your eyes, but they quickly go up and you focus on the birds in the sky. At that point you don't really see all the other things, even if you think to still "see" them.
The important part here is that we actually moved our eyes and focused on the birds as we thought about those, thereby excluding all other visuals for that moment. We do the same when taking photos. We see our subject and focus on it. Excluding all that goes on around the subject. Until we later examine the photo and see those nasty tree branches coming in from the side.
How do you keep that stuff out of your photo? By looking. In this case do not just look at the subject, but look at the sides of the frame through your viewfinder, or on the screen of the camera. Shift your attention to those sides and you can notice these branches. I'll be honest and tell you it's easily written, not as easily mastered. I am well aware of this principle and every time I tell myself I will pay better attention. Still I usually end up cropping photos or remove things with Photoshop, as I simply did not pay enough attention. You can see an example (unedited RAW, so not very pretty) above. I wanted to make a photo of that old kitchen. I thought it might be nice with that window and the kitchen sink on it too. So, I made sure I took the shot at an angle I thought would be well. Now look at the side of the frame. Do you think I noticed that arm as I took the photo? Of course not. I was busy looking at the kitchen stove. At home, looking through my photos I noticed that annoying arm almost immediately, though. Cropping this out is not hard to do, but paying attention would have made me put a step forward and that arm would be gone.
Now the good news: the experienced photographers claim that if you keep trying it will at a certain point become an automatism. I guess I so far have not tried enough. :)

Okay, we're almost done. The good part is: you have managed to come to the end of another post and still can live to tell it! The less good part is: we have not really gotten far with our magic word, so I promise I will come back to composition. There is still a lot to say about that and fill the frame is definitely not the only tool of composition. Even if I am pretty sure it is the easiest one.

19 February 2017

Raw food? Or pre-cooked?

What is this fuss?

As I was just starting with my camera I was naturally looking a bit around on the Internet. And there I found those awesome instructions. You know the kind of instructions from people who claim to know it all. It was obvious: a real photographer only shoots RAW. Obediently I made sure my camera did that too and started clicking. The first results were underwhelming, my shiny new camera made rather dull photos. Especially when I had the opportunity to compare my photos with those made by my sister, using a borrowed Canon EOS 450D. Hers were way better than mine! Little did I know that she shot JPG and I shot RAW. Nor did she by the way.

So the fuss is about the difference between RAW and JPG. Which both are image formats. The cool thing is, you can save both and you can view both. Both will show your photo. That should already make people wonder: "What is this all about? My photo is there, do I need to do anything?"
And as usual: the answer is not a simple yes or no, that would be too easy. So, we know that the answer is: it depends and that leads us to the question: "So, what does that depend on then?"
Let's first say that not every photographer will have that choice. Cell phones and point and click cameras tend to always use JPG.
DSLR's and the newer compact camera's usually offer a choice. One of these choices  is usually "RAW + JPG", meaning the camera will save each photo twice. Once in RAW and once in JPG. That's convenient, we don't need to think we can take both. Ha, life is easy. Or not, as shooting in both formats means we will use more space on the memory card. If you're low on that, you surely do not want to do both. That leaves either JPG or RAW.

Let's see this RAW stuff!

For that we first would need to see what is the difference between them. They are both ways to save photos and they both show the image you shot. But if you would make the same photo twice, once in JPG and once in RAW, then you would see a big difference. Let's start with a RAW image.
RAW image, straight from camera

This photo was made in a museum I visited. I thought that looked like a nice passage and found the big plates making a nice contrast to the wall. And then you do what all noobs do: you point your camera and click. The result is... well... not totally what I would have wanted.
As you can see the image feels flat, there seems to be almost no depth. The colors are bit dull. And, being a noob, I of course did not even have the camera straight, so it's at an odd angle. That latter part has nothing to do with the RAW format, just with not taking the time to make a proper photo.
Strangely enough, while this photo looks not that great, RAW actually has better "quality" than JPG. The main reason is the amount of brightness levels. To make a little detour, let's look at what a bit is. It's a "BInary digiT" and can be one of two values. These are usually represented by 0 or 1. Or you could call them on and off. And some call it true or false. If you would have 1 bit, you could have 2 levels of brightness. You would be able to have real B&W photos, with each pixel on the image being either white or  black. No shades of gray, no color, just pure black and pure white. If you would have 2 bits, you would have 4 possibilities. Written in binary they would be: 00, 01, 10 and 11. And with three bits that would double again to 8. They would be: 000, 001, 010, 011, 100, 101, 110 and 111.
By now it's probably clear that using four bits would give 16 possibilities. I am too lazy to write them out, but it will go to 8 bits per channel (either red, green or blue) for JPG. Which means we can have 256 possible levels of brightness for each color.
RAW format uses 12 or 14 bits. And that gives us a whooping 4096 or 16384 possible levels of brightness! As we're busy with photography, we'll quickly leave all this binary stuff and just keep in mind that RAW can have more possible values and can therefore record more accurate information about the color. So, if your camera supports this you would always shoot in RAW. Right?
Wrong, as JPG has advantages too!

Show that JPG too then!

We know JPG has less detailed information, as it uses less bits. The direct advantage of that is: less usage of your memory card as the file simply is smaller. It's actually not only smaller because each pixel uses less bits, but JPG also compresses the file, saving even more space. JPG is so awesome at compression, that it would be much smaller than, for example a TIFF file. However, that awesomeness has a price, as JPG uses what is called a lossy compression. When it compresses a file it actually is also looking for spots that have such minor differences that leaving that difference out is hardly visible. And that is then exactly what it does. It leaves the information out and there is no way of ever getting that back. That's considered a bad thing and every time you save an image in JPG, for example after editing, more information will be lost. So, please, do not go on editing, saving, editing more, saving. Edit once, save once.
How a JPG image could look
Anyway, let's go back to the advantages of JPG. Here you can see almost the same photo as the one above. This one was edited from RAW, so probably not exactly how the JPG would look. No, rephrase that: certainly not what the JPG would look. Which can be noticed immediately: this image is straight and not at an angle! That was indeed the first thing I did in editing. I also cropped it, but those actions have nothing to do with RAW and JPG. You can do that in both formats.
What is clearly visible is that this image seems to have more depth, the colors are more vibrant and those plates contrast more with the wall.
Although I made these corrections manually, the camera will do that for you if you shoot JPG. It will add contrast, make it more vibrant and sharpen your photo. In short: your photo will look much better out of the camera.
By the way, if you like the top image better than you do this bottom image, than I probably did a very poor job on editing. But should you feel like that, let me know and please tell me why, so I might improve my editing skills. And I will hand out kudos to the person who can tell what I all did during my edit.
Oh, did I mention we are elitist enough to not call this editing? We call this post processing. Or we say: "we can do that in post." So there you have a nice tip to at least sound professional. 😊

Okay, I got that. When to use what?

Let me start with a simple thing: if you're happy as it is right now, simply keep doing that. There are a few things you could consider.
If storage space becomes an issue, you're more or less forced to JPG.
If you do not feel like editing (sorry, post processing) your images, then also use JPG.
Should you want to send the images quickly on: use JPG. Or, if you want to show them quickly and later still work on them: use RAW + JPG.
If you want the most control over how your image will look, you would be better of shooting RAW. Just as you would use RAW to have the most information in the photo.

If we go back to the intro, where I said I had read all professionals shoot RAW, can we then say this is actually true? If you think so, you're wrong. Yes, professionals will usually use RAW. They tend to edit their photos anyway and shooting in RAW gives the best start for that. But now imagine that you're a photographer at the event of the year. For Americans I would say the Superbowl. For us mere Europeans we can take the finals of the World Championship Football (or for Americans: soccer).
You are there, and so are a hundred other photographers, all working for newspapers that need to print soon. With your photos. I hope you did bring your laptop to the stadium, so you can quickly edit the photo you just shot. Just as you are doing that, one of the teams scores. The decisive one! Yeah, you missed it, as you were editing.
Being a pro, you will certainly not let that happen. So you do not edit your photo, but send them over quickly. Shot in JPG. Goes also much faster over the wireless connection you and the other hundred photographers are sharing, as it is much smaller. And that would mean a score for you: your photo, page one on the newspaper.
Okay, for me unlikely but they say a girl can dream. And I add to that: a guy can dream too.

17 February 2017

Why photography

Going on vacation

Before talking about all things I experienced or hope to experience, I suppose it cannot hurt to at least explain where it started. And that is because of a combination of two vacations. One to Uganda, which I did in 2016. And one to Kenia, quite some years ago. Not that I never went on vacation in between, but - coming from the Netherlands - for both countries the wildlife and landscape are amazing and special.I really loved the trip to Kenia and I was lucky enough to have a professional photographer from Belgium in the group. He carried a big backpack of equipment around all day. And at the end we got a video tape he had made.
I can tell you, that was much better than the photos I had made. What stood out the most with those photos was zoom. My camera at that time had little zoom and most photos turned out like: "There in the distance, that small spot. That's a lion."
So as I planned my vacation to Uganda I knew I wanted a nice camera. I had a point and click camera which, I thought, made fine photos. But I wanted something better and got an entry level DSLR. In my case a Nikon D3200, it came with two kit lenses and I especially for the vacation also bought a Sigma 150 - 600 mm lens.

Now they say that a good photographer can make awesome picture with a cheap point and click camera, and that gear is not decisive, but for a nobody gear helps a shit load. The quality of my photos went sky high, compared to my previous photos. And given the quality difference I doubt you can get those awesome photos with a cheap camera. You might make interesting ones, but they will not be as good as the photos you can make with the better camera. This doesn't mean that I believe gear determines everything, but I do believe that to make quality photos, you need at least a good camera. Doesn't need to be the best, but can't be a poor one either.

Hippo's can stare back at tourists. Specifically those in Uganda.
Anyway, I had bought this camera a little while before my vacation, so went out a few times to make photos and then took it along to Uganda. My first wish would be that I had had it earlier and actually tried to learn what all these settings were. The amount of wasted photos is enormous. Luckily still plenty reasonable photos left to have as a memory. But the amount that were overexposed, or underexposed, or ruined by high ISO or had motion blur due to too slow shutter speed is way too high.

In short: I was happy shooting photos and found it interesting enough to keep on making photos. Yet, for all other noobs out there like myself: learn a little bit about your camera before going to use it on your vacation. Really do. This is the most awesome tip I will ever give you. :)
Make sure you do not go out there without being able to change for example your ISO setting. Oh, and should you shoot in RAW, don't be disappointed about the look of your photos, compared to those of someone else shooting JPG. Yes, yours will look rather bland at first. And I will use this awesome blog thingy to even explain why. But that's for next time. For now you can thank my vacation, as that is the reason I started photography and later started this blog. Or curse my vacation as it means you now wasted some minutes of your life reading this stuff.

Don't forget: best learning is done by practicing, so if you are a beginner: go out and make photos. Above all though: make sure you have fun doing that!

13 February 2017

The one triangle to rule them all

The exposure triangle

There is no blog about photography that can escape this one. Like Sauron in the Lord of the Rings books  had his one ring to rule them all, photographers are stuck with one triangle to rule them all. No matter how well equipped you are, no matter how much you studied, no matter whether you're a professional or just clicking away, this triangle will determine how your photos will look.
And what is it about? Light. More light or less light. And as we do not want black photos, nor white photos, we need to come up with something that sits in between there and in a way resembles the amount of light we had when shooting the photo.

Where is that triangle?

It's everywhere! You cannot avoid it, every photo you make is faced with that triangle. However with the simple camera's or with smart phones you are not exposed to the exposure triangle. The camera will determine the settings based on what it determines to be the best. If you buy a more advanced camera, it will have knobs and buttons and you are supposed to make sense of these settings. The good news: these camera's also come with an "auto" mode. And the camera will in most modes (partially) control what is needed.
But most people did not buy such a camera to only shoot in auto mode. So, off you go to websites or books to learn about the three settings. These are called shutter speed, aperture and ISO. If you want some good explanations, just google exposure triangle and click on links. It is explained many times. And just to add yet another explanation, I'll add mine here too.

What is it all about?

The above mentioned settings have different influences on how the photo looks, but they all have one thing in common. They influence the amount of light that reaches the sensor in the camera. So we need to tweak these settings so that we have the correct amount of light, and the secondary effects of these settings to give us the photo we want. And that means that changing one setting, will raise or lower the amount of light on the photo and to offset that, we might need to reduce one or both of the other settings.

Shutter speed

The first setting is shutter speed. And it determines exactly the... *drum roll* ... shutter speed! It opens the shutter for an amount of time, allowing light to reach the sensor. And then it closes the shutter. The longer the shutter is open, the more light. Can't get any simpler than that.
I hear you say: "But wait, what is that other influence this setting has then?"
Movement. If things in front of the camera move while the shutter is open, that will cause a blurred effect on the photo. So to keep everything sharp, you want a fast shutter speed. And that in return means: less light. Of course it is a bit depending on what you want to shoot. The racing car just whooshing along will surely need a much higher shutter speed to be seen as sharp than... oh well, the magnificent pebble laying on the path in your garden. Given the speed that the pebble moves, one can see that a shutter speed of hours would still leave it pretty sharp on the photo.

Aperture

The second setting is called aperture. It determines how wide the opening in the lens is. Obviously the wider the opening, the more light can enter. Now you start thinking: so I take a photo of that racing car mentioned earlier. And you know that to keep that sharp, you will need a fast shutter speed. Easy: just have a wide aperture. problem solved, we can go home. Right?
Not yet. This setting has also a secondary effect. Your super wide aperture that got the racing car super sharp, managed to get the tip of the car sharp. The rest is... well... blurred. Hey, you shoot: I had the fast shutter speed. Where is that blur coming from?
From your aperture. The secondary effect of aperture is called depth of field and basically tells the camera: I want only a small depth to be in focus, so blur the rest. Isn't this great? To get the whole car in focus and not blurred, we cannot use the widest aperture. We need to narrow the aperture. And thus we get less light on our sensor. Which brings us to our last setting...

ISO

ISO is the International Organization for Standardization and apparently that organization is housed in your camera. Or they have remotes and do complicated things from their offices to access your camera and influence your photos.
Okay, I admit: I never saw them in my camera, nor using remotes. So, the people working at that organization most likely do nothing. But they did define a standard about the sensitivity ratings for camera sensors. Quite useful actually, because we now can talk together and know we are talking about the same. Otherwise I am sure each manufacturer would have different ratings there. I guess by now you're stamping your feet and want to shout at me to tell you what it does. Or not, but if you did not: I will tell you anyway.
This setting determines, which you guessed already of course, the sensitivity of the sensor. The higher the setting, the more sensitive the sensor is. Making it work with less light. And that should solve our racing car problem. We just turn that setting fully upwards and then take the shot.
Isn't that beautiful? We have the motion frozen thanks to our high shutter speed, we see the full car without blur, thanks to our low aperture and thanks to our high ISO settings we see... what are those specks all over the photo?! Where did that come from?
Yes, you just found out the secondary influence of the ISO settings. The specks are usually called grain. And the higher the ISO setting, the more you get of it. Which is why in general the ISO setting is kept as low as possible.

How to make the perfect shot?

I am going to tell you the secret now. You don't. If there was not enough light to keep the settings so you could have fast shutter speed, wide aperture and low ISO, you will need to sacrifice. And here comes your choice. I mean: do we really need to see the whole car and boarding along the road sharp? Perhaps we want to see the driver very sharp, the car a bit less sharp and the boards full of advertisement? Well, the boards do not need to be sharp at all. So, you can pick a bit wider aperture easily. And so you can make your choices. Perhaps you think a bit darker photo might be just the look you want.

As you see: you are bound by the triangle, but within it you are free to move as you want. You can pick how you want to have your photo look. And that is why not shooting in auto mode can be a good thing. Yes, in many cases the camera will pick good settings. But the camera does not determine what you want to show. It picks according to its internal programming.
You might not be forced to sacrifice, sometimes you choose to do that: you might want that smooth look from a waterfall that requires a longer shutter speed. The camera will never do that. You have that choice. And while you cannot escape the triangle that rules them all, you might well be able to make the triangle work for you to show your skill as a photographer. And should people tell you how great your skill is: tell me how you got there, so I might one day call myself skillful too. 😜

12 February 2017

Start of a blog

Why a blog?

The short counter of this would be: why not a blog?
Ah, I hear you say: "There are so many, what makes this one different?"
My answer would be to tell you there is no difference. That it will not be better than any other blog. Perhaps even worse. There is of course a major difference for me: this is my blog. And that makes it special to me. Even if alone for the fact that I will be doing the work of writing this time, instead of only reading.

The above did not answer the question in the heading.
To be honest, I am not sure why. I like writing. Not that I am great at it, and especially not in a foreign language like English. But I do like it. Perhaps it is the creative process involved in it that attracts me, just as in photography. And, just like photography, you can be mediocre and still do it.
It's probably part an eagerness of sharing my opinions. It's part the wish to tell about photography. Not in the way an expert would, but in the way as I experience it. Many blogs are written by people knowing very well what they are doing and what they are talking about. Mine will most likely never turn out that way. Just for the reason that I do not aspire to become a professional photographer. I have a job and like to make photos in my spare time. I like post processing them even more. But I like it as a hobby. To relax, to spend a nice time. And to not have to feel bad should I do nothing with it for a while.

What to expect?

That is a question I cannot answer fully right now. I can tell you what I think currently, but with passing time, things change, people change and so do blogs change. My intention is to keep this mostly about photography.
That means photography in general, but for a big part it will be about how I experience this. So, it will also be a bit about me (no worries, I will leave all the NSFW stuff out 😀). I will most likely point to things I found on the net, or post a photo. The photos I might post will be mine, or I will be as certain as I can be that I am allowed to post them. I then might give my opinion about a photo or site. I might tell about what I thought or was doing when I took a photo. Or perhaps I might just tell how I changed it in post processing and why. Or how I did it.


How often will there be content?

That one is more easy to answer. That is - in the end - depending on readers and feedback. If I find that after a while still nobody was interested in reading the blog even once, then I am probably going to stop. If I find there might be people taking the time to read it, I will most likely go on and keep posting. However I do expect not more than once a week. Could be a little above that in the start, and could be a little less often later on. As at this point I have some ideas about what I might blog about, but  if those are written, I would have to find new topics.
But, if I find people not only willing to read, but perhaps some that actually would want to contribute, there might be a bit more.

Now, I probably should not waste more of your time and leave you as reader to pursue other interests. Especially as I think this should suffice for the introduction of this blog, giving you a rough impression what it will be about.